
Salt-Cured Egg Yolks: Your Secret Umami Weapon
Transform your surplus of eggs into rich, savory flavor bombs with this simple salt-cured egg yolk recipe.
By curing the yolks, you’ll intensify their natural flavor and turn them into versatile, umami-packed gems that can be shaved, grated, or sliced over a variety of dishes. Perfect for beginners in curing, this easy process requires only Kosher salt, egg yolks, and a little patience. Use these flavorful yolks to enhance pasta, toast, salads, grilled meats, and more. They’re your new dairy-free parmesan or fish-free bottarga—and soon, your kitchen staple.
By: Tanner Boatwright
Chef's Notes:
If you have a flock of hens, there will come a time—probably in spring or summer—when their egg production goes into overdrive, and you might feel like you've had your fill of eggs. That’s where salt-cured yolks come in to save the day. The yolk, which carries most of the flavor, transforms into something incredibly rich and versatile through salt curing, while the whites mostly serve as protection for this flavorful gem.
Salt-curing intensifies the yolk’s flavor and changes its texture, allowing it to be used in a variety of dishes. Plus, it’s a simple curing process that requires minimal effort, making it an ideal introduction to curing for beginners. All it takes is salt, yolks, and some patience during the two-week curing process.
When they’re ready, these cured yolks become salty, umami-rich bites that can be shaved, grated, or sliced over a range of foods—like pasta, toast, salads, meats, roasted vegetables, and even more eggs. Think of them as a dairy-free parmesan or a fish-free bottarga. Once you try them, they may become a kitchen staple.
---
Ingredients:- 6 fresh egg yolks- 1 box Kosher salt
---
Preparation:
1. Prepare the Salt Bed: - Pour a layer of Kosher salt, about ½ inch deep, into a non-reactive container. Make sure the bottom is completely covered.
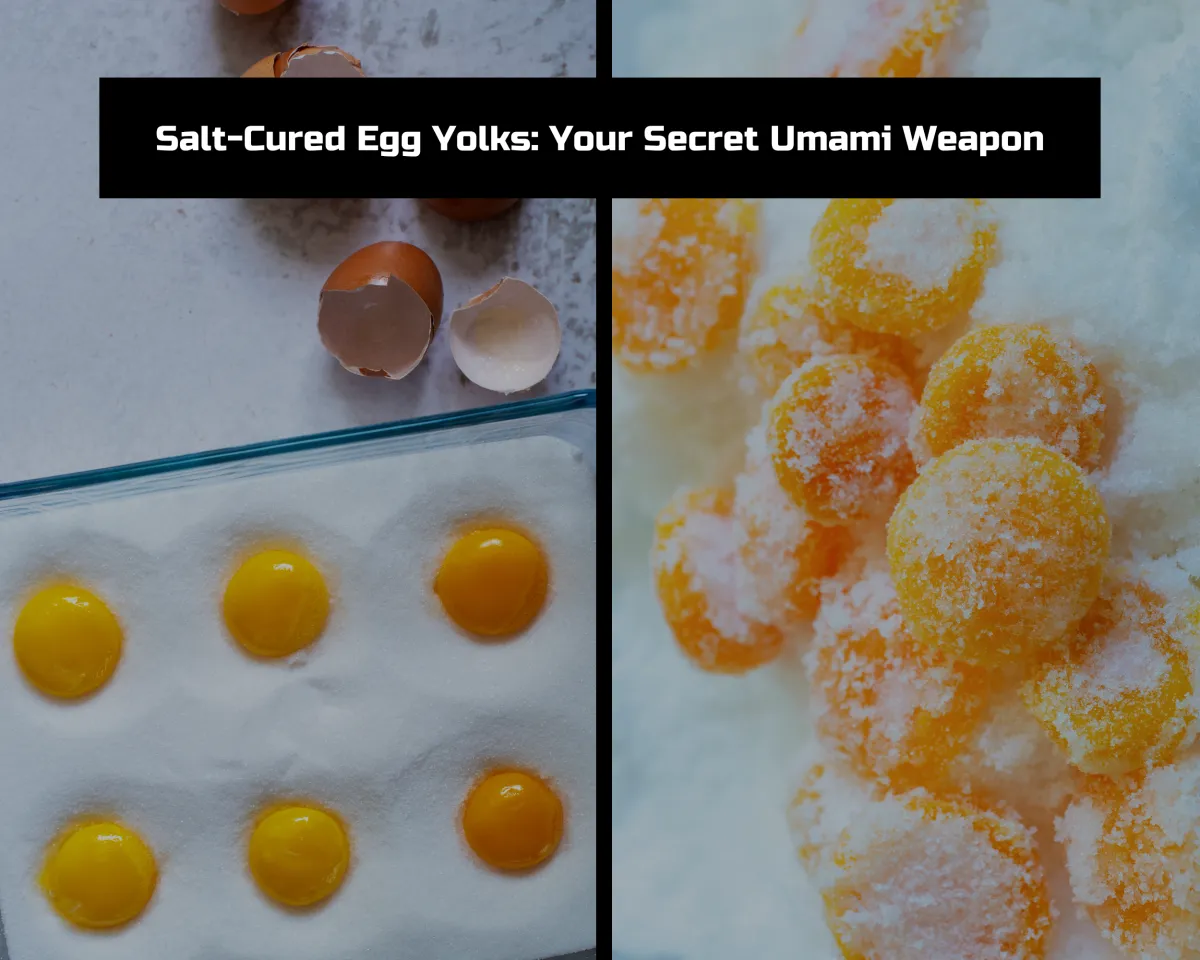
2. Create Depressions for the Yolks: - Take an egg (still in its shell), and use the wider end to press six small indentations into the salt. These will be where the yolks rest.
3. Separate the Yolks: - Crack each egg, separating the whites into another container (for use in another recipe). Gently place the yolks into the salt-filled depressions.
4. Cover the Yolks: - Pour enough salt over the yolks to fully cover them. You should no longer be able to see their color through the salt.
5. Cure in the Fridge: - Cover the container with a lid or plastic wrap and place it in the fridge. Let the yolks cure undisturbed for one week.
6. Prepare the Cheesecloth: - After one week, unwind about 18 inches of cheesecloth and lay it flat. There’s no need to unfold it width-wise.
7. Remove and Clean the Yolks: - Gently lift each yolk out of the salt, using your finger to carefully pry it from the bottom. Brush off any remaining salt and reshape the yolks into neat circles if needed.
8. Wrap the Yolks: - Place the yolks evenly along the cheesecloth. Fold the sides over the yolks and tie string between each one, as well as at both ends, to create a chain of yolks.
9. Hang to Dry: - Hang the yolks in a cool, dry area—such as the fridge or a clean pantry where the temperature stays below 50°F. Allow them to dry for 5 to 7 days.
10. Check for Doneness: - The yolks are ready when they feel firm and can be grated like a semi-hard cheese. The remaining salt should easily brush away, and the yolks should no longer feel sticky.
---
Immediate Storage: - Keep the dried yolks wrapped in cheesecloth inside a sealed container in the fridge. They will stay good for up to a month, though you'll likely want to start a new batch as soon as one is done drying.
Long Term Preservation: They can also be vacuum sealed and frozen for up to 6'ish months, some say longer. Just remember after thawing to keep cold and dry in the refrigerator and use within a week or 2. To vacuum seal, add some salt to the bag to prevent the yokes from gelling while freezing. Some will also wrap the yokes in cheese cloth to help prevent gelling during thawing. Test many methods to find the best one that works with your needs.
---
Enjoy these versatile, umami-packed treats in the field for a protein boost or as a new statement addition to your kitchen!
-Theres a continuation with this recipe to use the eggs for a bread spread that I will upload soon. Its lovely!-
COMPANY
CUSTOMER CARE
LEGAL
FOLLOW US
Copyright 2026. The Right Pursuits. All Rights Reserved.